30 Aralık 2011 Cuma

How to choose gases for deep dives by Volkart Spahr


To remember 
VOLKART SPAHR 
He had a paradoxical ambolia after surfacing from a normal dive and passed away in a decompression chamber in Egypt. (05/11/2011)


(This article was posted to www.diversaround.com)


There are some rules we should follow:


1. max pPO2 for the bottom gas = 1.4 bar, on dives deeper than 100msw better less (1.0 - 1.3)
2. max END = 40 msw or less (40msw is ok for the Red Sea, for cold water and bad viz I would choose 25msw)
3. Every gas with a pPO2 of less than 1.0 is basically useless for decompression
4. For the switches: the next gas should not increase the N2 content by more than 10 percent points
5. Switch to next gas on a pPO2 of 1.6
Easy? Easy!


Let's do some calculations on an example for a 120msw dive!


On 120msw we have 13 bars of ambient pressure. So the gas we breath should have a total pressure of 13 bars, means: 1.3 bars of O2 (rule 1) + 3.95 bars of N2 (rule 2, we are in the Red Sea) + x bars of He. pPHe = 13 - 1.3 - 3.95 = 7.75

To get the percentages, we need to divide all the numbers by 13 and we are back on the surface (ambient pressure of 1 bar):

O2: 1.3/13 = 0.1 = 10%

N2: 3.95/13 = 0.308... let's say 30%

He: 7.75/13 = 0.596...let's say 60%

Now we have our bottom gas. it will be a 10/60


What will be the next gas?

According to rule #3 we need to figure out, on which depth we will have a pPO2 of 1.0:
1.0/0.1 = 10 bars = 90msw
No we need a gas for 90 msw
First we need to calculate the O2-content:
1.6/10 = 0.16 = 16%
According to rule #2 we need at least 39.5% He (3.95/10 = 0.395 = 39.5%)
But: according to rule #4 we should have an N2 content of max 40%.
We can play a little bit with the numbers, but personally, I wouldn't take a gas with let's say more than 42% of N2.
So we will have a gas with 16% O2, 42% N2 and 42% He which will be a 16/42

What will be the next gas?


Where will this last gas reach a pPO2 of 1.0?

1.0/0.16 = 6.25 = 52.5msw

1.6/6.25 = 0.256 = 25.6% O2, so let's say a 30% (at a certain point, we should use standard gases, even when we are for a moment under a pPO2 of 1.0).
Max N2 content = 52% (rule#4).
100 - 30 - 52 = 18% He, the gas will be a 30/18 (or 30/20)
For the next switch I would say goodbye to the He. As experience shows, a switch from a gas of max 30% He to a gas with no He can be conducted w/o any problems.
So we will have our switch on 1.6/0.3 = 5.3bars = 43msw.

Next gas:

1.0/0.3 = 0.333 = 23msw.
To stay with standard gases, I would use a 50%, switched on 22msw.

If you would go on like this, you would've a lots of tanks to carry.
Personally, I would use the bottom gas as mentioned above (10/60), the 16/42 as a deep travel gas, the 30/20 as travel mix for descending (and, of course, also while ascending), the 50% at 22msw and O2 at 6msw. In this case you need support divers to supply you with air for the airbreaks (don't use a gas which contains He for airbreaks). But for a dive to 120msw you will need support divers anyway to have backup gases ready for each switch depth (ok, maybe not for the first switch, but to have a backup gas in a 70 meters range is very nice...)
Nice diving...cu somewhere in this wet world, Volkart


27 Aralık 2011 Salı

What is the difference between DIN "200 BAR" and DIN "300 BAR" valves?


The Deutsches Institut Für Normung (DIN) is a German standards setting organization similar to our American National Standards Institute (ANSI) and Compressed Gas Association (CGA). DIN 477 is a specification that recommends cylinder valve outlet and connector designs for specific types of gases and pressures based upon safety considerations. These various designs have deliberate incompatibilities to preclude the possibility of errors when handling different types of compressed gases at differing working pressures. The two valve outlets and connectors of interest for divers are the DIN 477 No. 13 and the DIN 477 No. 56 (formerly No. 50), both designated for use with compressed air. The DIN 477 valve and regulator fittings are most widely used outside the U.S. The regulator first stage DIN connector is a male screw type, and instead of clamping on to the outside of the valve as does the yoke, it screws directly into the female DIN outlet of the valve. The sealing O-ring is held in the end of the regulator connector rather than in the face of the outlet. The DIN 477 system, with its captured o-ring design, has proven to be very reliable for use with SCUBA. Outlet/Connector #13 is from DIN 477 part 1 - for cylinders with test pressure ratings up to 300 BAR and is commonly referred to in the SCUBA industry by the slang term "200 BAR", probably because most cylinders with 300 BAR test pressures have working pressures in the 200 BAR range. Outlet/Connector #56 is from DIN 477 part 5 – for cylinders with test pressure ratings up to 450 BAR and is commonly referred to in the SCUBA industry by the slang term "300 BAR". The two designs are nearly identical, but the #56 valve outlet is deliberately deeper so the shorter #13 connector will not be long enough to seat properly. This is a safety feature to prevent connecting a low pressure device to a high pressure supply. It's important to understand that the "200 BAR" or "300 BAR" descriptions are just slang terms that have nothing to do with the pressure ratings of the outlets and connectors themselves.

Frequently Asked Questions about 200 BAR vs. 300 BAR

Is a 300 BAR SCUBA valve outlet stronger than 200 BAR?

No, they are the same. Only the first few threads in both the 200 BAR and 300 BAR outlet designs are doing the work, the remaining threads on the 300 BAR outlet are there simply to create a deliberate incompatibility with a 200 BAR connector. In fact, in practice, the 300 BAR valve outlet has proven itself to be more fragile than the 200 BAR valve outlet. The 300 BAR valve outlet is so long that the smallest 'ding' on the edge of the opening can slightly warp the cylindrical opening, causing the regulator to become difficult or impossible to completely seat. This problem does not seem nearly as pronounced with the 200 BAR valve outlets; although it remains an issue and all DIN outlets should be protected from dings.

If a SCUBA regulator has a 300 BAR connector does it need a 300 BAR SCUBA valve?

No, the 300 BAR connector of the regulator is designed to work just fine with a 200 BAR valve outlet on a cylinder. The regulator connector will require fewer turns to seat with a 200 BAR outlet and is much more convenient to use in that regard. Once fully seated in a 200 BAR valve outlet, two threads of the regulator 300 BAR connector are visible; this is completely harmless and normal -- two exposed threads are not going to 'weaken' anything.

If I have 200 BAR valve outlets on my cylinders, should I purchase a regulator with a 200
BAR connector?

The DIN connectors seen on modern regulators sold are always the 300 BAR variety that fit a 200 BAR outlet just fine. There is no reason to seek out and use a 200 BAR connector on your regulator.

Is the 300 BAR SCUBA valve "better"?

No, not in any way that engineering science can justify. The 300 BAR valve is in NO way better than a 200 BAR valve for the SCUBA applications for which they are being used. The 200 BAR DIN outlet actually has the advantage that it can accept an insert that allows it to be used with the very common GGA V-1 connector, aka "Yoke" or "A-clamp", in wide use on regulators in the US. Because 200 BAR valves are more widely used than 300 BAR, they benefit from economies of scale in production and distribution, meaning that 300 BAR valves are more difficult to find and more costly. Since 200 BAR valves can be adapted to Yoke, are more convenient to use and less susceptible to damage, some feel the 200 BAR outlet is better than the 300 BAR outlet.

Does a yoke adapter insert exist for my 300 BAR valve?

No. An adapter insert does not exist, and even if it were made, we have never seen a yoke clamp long enough to fit over the 300 BAR SCUBA valve. There is a yoke-to-din fill adapter device for 300 BAR valves, but it is strictly for filling only.

Is there any reason I should use a 300 BAR SCUBA valve?

For the sake of uniformity, some divers who started with 300 BAR valves continue to select them when purchasing new cylinders, just so all their cylinder valves have the same type of outlet. Some individuals in diving leadership roles may insist their students and peers use 300 BAR valves, usually with the vague justification they are 'better' because 300 BAR is a higher pressure than 200 BAR. A common misconception is that DIR philosophy or GUE training standards require 300 BAR valves, which is untrue. If using the 300 BAR valve outlet will provide uniformity, peace-of-mind or peer acceptance then do so, because there is no major reason to avoid using 300 BAR SCUBA valves.

21 Aralık 2011 Çarşamba

WRECKSPLORATION TECHNIQUE by Mark Ellyatt (www.inspired-training.com)


STAY OUTSIDE! 
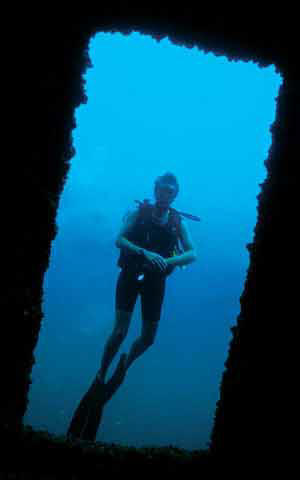
For many divers the greatest thrill is exploring ship wrecks. But, as you progressed through your open water training, you were no doubt constantly reminded about the dangers of entering wreckage or any overhead environment. The dangers are real and valid whether you are a relative new comer to diving or a seasoned dive professional with many thousands of dives. Overhead environments take various guises, but more divers obtain cavern and cave training nowadays over wreck.  Although similar, caverns and caves are hardly as challenging or as interesting as swimming through the twisted and sharp confines of the sunken museum.

The differences between cave and wreck are many.  Caves have generally one exit and this makes them seem dangerous. Wrecks, however, appear to have many, and this leads to diver complacency and failure to obtain training. The cave typically has an out flowing current to help your exit, whereas the wreck offers no assistance or consistency and actively seeks to entrap you with its rusted metal claws.
Before you enter any wreck you should obtain Advanced Wreck diver training which will help you start appreciating the added hazards that go hand in hand with your trips into the magnetic overhead environment. Proper training will provide in- water skill building focussing on the emergency drills needed to safely exit should trouble occur.  On completion of training, you will be able to cast off your “open water safety wheels” and enter the most hazardous of the underwater domains…the rusty shipwreck. There are many reasons to go inside a wreck.  Many of you will, no doubt, have prematurely been attracted to the darkness and ventured where you shouldn’t. It is very alluring to stick your head in and before you know it your whole body is propelling you into a possible early grave.  However, after as little as 5 days training you can safely penetrate these passages and live to tell the tale. Think of advanced wreck training as a sub aqua prophylactic helping prevent  unwanted complications!
Wreck Penetration by definition means going into an area where direct access to the surface is not available. Even a brief “look see” means you have penetrated the wreck and should have laid a line to show your exit route. Wreck penetration should always involve line laying, and good line technique is an art in itself. Wreck penetration techniques are beyond the limits taught in a standard wreck course.
Standard wreck courses, often called a specialty course, offer an insight into wreck history, focus more on basic mapping and offer very little in line laying or actual overhead environment experience. These speciality courses are aimed at the relatively neophyte diver who seeks more interesting dive destinations without the hazards and dangers of entering the overhead environment. Typically, a linear distance to the surface limit is imposed of say 40m, which means that a wreck laying in 35m allows a maximum penetration of 5m. An Advanced wreck course generally has a maximum depth limit of 50m while breathing air, but it would be advisable to use trimix inside wrecks deeper than 30m.
There are no restrictions on penetration other than adhering to the following safety protocols:
1: No entering areas that two divers cannot enter side by side
2: 1/3 rd's gas management protocols adhered to
3: No equipment to be removed within the overhead environment
4: Guidelines to be used, in all overhead environments.
When entering a wreck the guideline will be attached in two places called the primary and secondary tie offs and you should always lay a new line if you suspect an old one. Unlike the tourist caves of Florida or Mexico the wreck diver will not have the luxury of simply following a permanent guideline.
A good propulsion technique will ensure you have relatively clear water to exit in. Many experienced wreckers simply use a pull and glide technique as this tends to preserve the visibility. There are some awkward skills to master, what with laying the guideline sensibly and holding your dive light all while navigating the wreck and avoiding silt outs.
Silt is a potential killer while wreck diving and no matter what your fin style, Silt will rear its ugly head at every chance. Silt is defined as particles occurring in the water, and due to their suspension, affecting visibility during the course of the dive. Silt can be either manmade or natural, i.e. rust particles or clay particles. There are various types of silt you may encounter in a wreck, these include:
Sand grains: the least serious, generally falling out of suspension very quickly.       
Mud: A bit more serious, because it is easy to disturb and may take a long time to settle.
 
Clay:  More serious, easy to disturb, takes hours to settle, sticks to anything
Volcanic ash:  While not exactly common, proves a serious problem due to magnitude of deposit and fineness of particulate. Some popular sites in the Philippines suffer very badly, with ash deposits almost a metre deep in places
Man Made:  Due to the many types of substances used in ship construction, the following are included: Rust particles, carpet fibres, hardboard, and wooden panels, expanded foam panels. Oil /fuel residues, becoming re-suspended, Coal dust etc
Wrecks lay in all manner of positions on the seabed; it would be very difficult to say where most silting would occur. With floors becoming ceilings and sidewalls becoming floors, its best just to watch where you are going, and use the most suitable propulsion techniques. In areas of suspected silt build up, it would be prudent to maintain a closer position to guideline, often maintaining a “loose ok” sign where visibility is compromised. A good approach to entering a silty overhead environment is to touch nothing and watch where you are going!
Wreck exploration is better accomplished with a dive buddy, but not a dive party!  The buddy behind can illuminate possible line placements and help with any wreck entanglement problems. The bigger the group that enters the wreck the poorer the visibility and this will have a dramatic effect on group safety.
If the size of the corridors inside allows, divers may wish to use a frog kick or modified flutter kick. These types of kicks direct the power of the fin kick backwards and not up or down which will help maintain visibility. With the fin power directed behind, you should obviously have perfect buoyancy control or you will find yourself constantly falling to the floor!
Apart from the dangling stuff, this diver shows good horizontal trim
Early sorties into a wreck should be limited to the no decompression limits, until your experience and subsequent training allow for more adventurous penetrations. Any decompression cylinders should be clipped off just inside the primary tie off point, as they would drastically increase entanglement risk.  The use of Rebreathers inside the narrow confines of a wreck is also to be avoided as they are huge line tangles waiting to happen.
To safely proceed through a multi deck shipwreck requires a series of dives each designed to fulfil a single objective. The early dives should focus on map building and reconnaissance. As a greater knowledge is built and guidelines extended, the dead end areas of the wreck can be eliminated and the desired destination more quickly reached, whether it’s the engine room or the purser’s office.
Equipment should be stream lined with no danglies. Spare masks or back up knives or tools should be kept in pockets, (but back up lights are never put in pockets). A rusty wreck tentacle will actively attract the ill prepared wreck diver, and often, sadly leads to an indefinite bottom time!
Unlike a cave, wrecks have no out flowing current to impede your entry progress. Therefore there will be nothing to assist the exit either. This had led many cave trained wreck divers miscalculating the exit time and gas reserves. Any good training course will have an extensive kit shaping session. The equipment will have all first stages routed “hoses down”, to avoid damage. Manifold use must be mastered in a hovering horizontal position. If greater depth necessitates helium use and therefore suit gas in an argon bottle, much thought needs to address the bottle placement. On the mixed gas train of thought, divers should routinely lower their equivalent narcotic values when planning a wreck penetration, to increase alertness in a stressful situation.
Primary Reel with Back up light attached to assist during exitThroughout the wreck, divers should be visualizing the exit they came from and any closer exits as they emerge (If decompression tanks have been left by an entrance then this is the only exit). Finding safe and interesting wrecks to explore is difficult and time consuming. The skills learnt on a wreck training course, are easy to remember but very difficult to do smoothly without constant practice. During Advanced Wreck training you will get familiar with line laying into the wreck and being a competent buddy. Once line laying skills are perfected, you get to hone your emergency skills. Exiting while air sharing, via a long regulator hose seems quite straight forward, until, you add a buddy with questionable buoyancy and some depth changes. In any situation like this you will try to stay as calm as possible and always swim at a pace that does not elevate either divers breathing. To add some additional spice to the training, your instructor will have you navigating the wreck will your eyes closed to simulate poor visibility and may combine this with air sharing also!
Tactile signals can play a big part inside a wreck. You may have the brightest, most expensive dive light there is, and two back ups, but if the visibility is nil then they won’t help you… A touch contact system has been devised that allows a team of two or more to exit safely and quickly. Devised by Don Rimbach (well known Cave Diver), as a means for several divers to exit an overhead environment. This method uses squeeze signals. Lead diver waits on guideline for diver behind to make contact (above knee preferably). Second diver PUSHES ONCE to GO. To stop exit Second diver SQUEEZES ONCE  (lead diver waits). To back up second diver PULLS BACK on lead divers leg
 
 In a low visibility situation, dive team members find guideline immediately. Lead diver waits for next diver to make contact either just above knee or maybe divers bicep area. When team is assembled last diver “Pushes” next and so on and group exits maintaining “Loose OK” on the line until visibility improves. In the event of an entanglement diver “squeezes” the next to signal stop. Should a diver need to back up,  he simply “Pulls back” with his hand. Group should wait until problem is fixed and “Push” squeeze is felt to continue. All team members should maintain contact at all times when visibility is compromised. This skill should be practiced often.
Never pull on the guideline
Finally, imagine you and your buddy, in zero visibility, are following a line and you encounter a “dead end” and need to turn around. Discuss with your buddy a suitable touch signal you could use to achieve this
 An Advanced wreck course is a mostly practical experience, but for completeness a thorough course will have a training manual to cover the basics and give a reference source for the material. Although very little of use has been written in the way of wreck diving techniques, my own guide to Advanced Wreck Diving  provides a fresh and innovative way of mastering the academic phase of wreck diving.
 There are various new light and hand signals to learn, these signals are very similar to any used in the total darkness environment.
Pictured below are the special hand signals particular to the overhead environment. Standard open water hand signals are not included. If in doubt standard hand signals should be reviewed with your Instructor


The above hand signals show some new signals peculiar to the overhead environment. These signals are very similar to those used in Cavern and Cave diving. The signals for “OK”, “HOLD”, “EXIT” are control signals. They are to be mirrored back to originator to make sure that they are understood.
 When in any overhead environment, any diver can call the dive at anytime for any reason. Never succumb to peer pressure and enter the wreck if you don’t feel “up to it”. All divers have differing performance levels that vary from day to day.
  As you swim through the wreck, accept that the dive maybe finished by any of the team for reasons that may not be obvious.
To enrol on an Advanced Wreck Course, the pre requisites are a recreational wreck or cavern speciality ticket along with 50 dives. A very useful pre qualification would be nitrox and or decompression diver, as these will enhance the experience greatly. The course should typically include 6 dives inside proper ship wrecks not sterile McWrecks. As with any advanced diver training, your instructors experience is invaluable (check they have some) .Before shelling hard earned cash over, always check out the training sites on a fun dive, ensuring that the overhead environment is actual and not virtual! You owe it to yourself to ensure that the training you receive has value and will prepare you for dives unsupervised. Guided wreck penetration is very rare. Inside a wreck is the last place for an ill prepared badge collector!
 
 REMEMBER...NARCOSIS TURNS FERROUS TO BRASS!  LEAVE IT DOWN THERE...

Isolation Manifolds by John Liddiard (http://www.jlunderwater.co.uk/index.htm)


Isolation Manifolds

Do you dive with twin cylinders and an isolation manifold? How fast can you isolate and shut a cylinder down? Would you bet your life on that?
With independent cylinders, a diver needs to swap regulators to balance the gas used between the cylinders. The objective is that at any point in the dive either cylinder should have enough gas to get back to the surface should the regulator on the other cylinder fail.
On a dive planned by rule of thirds, this amounts to never letting one cylinder get more than 1/3 ahead of the other cylinder. In practice, most divers seem to keep a little extra margin, maybe aiming to not let one cylinder get more than 50 bar ahead of the other cylinder.
Reaching for the isolator. Link to copyright statement. 01_209_12_small.jpgWith manifolded cylinders, a diver breaths off just one regulator for the entire dive, save for maybe a few breaths of the back-up regulator to check it is working near the start of the dive. There is no need to swap regulators as the two cylinders are interconnected.
Even with an isolation manifold, following a regulator failure with gas escaping, both cylinders will loose gas until the isolator is closed; then the cylinder with the failed regulator will continue to loose gas until the cylinder tap is closed. Once everything is stable, the isolator tap can be re-opened to enable the working regulator to draw gas from both cylinders.
The worst case for an independent twin set should be that at any point in a dive the remaining cylinder will have just enough gas for the diver to get back to the surface. So the target for a manifolded set should be, at any point in the dive, to be able to isolate and shut down before half the remaining gas is lost.
If the isolate and shutdown can be made faster, the diver with a manifolded set has a better safety margin. And if the isolate and shutdown is slower, there may not be enough gas to return to the surface. So a diver with an isolation manifold needs to practice isolate and shutdown drills to make sure that in a real situation they gain rather than loose.

Just how fast does an isolate and shutdown need to be?

I set out to take some measurements. Or rather, I co-opted Steve Chaplin to help me take some measurements. I couldn't do it without help because I have always used independent cylinders. It's a personal thing, I like the modularity of being able to brake gear down and reconfigure it easily. Also I am not very flexible; I am not sufficiently proficient at an isolate and shutdown drill to, as I mentioned, bet my life on it.
On the other hand, Steve has a set of 12 litre cylinders with an isolation manifold. He is also quite flexible and proficient at gas shutdowns. Nicely on the opposite side of the manifold fence to me.
Simulating regulator failures. Link to copyright statement. 01_225_03_small.jpgOur experiments began fairly simply in the car park outside our club’s compressor room.
As I mentioned, Steve’s rig is fairly typical. 12.2 litre 232 bar Faber cylinders, Scubapro cylinder valves and isolation manifold equipped with Sherwood rubber knobs for easy shutdowns, and DIN fitting Scubapro mark 20 demand valves. One with a long hose, and one with a pressure gauge. The only modification we made was to add a second pressure gauge so we could measure each cylinder pressure independently.
Steve rigged his twin set with regulators. We doctored it to simulate a range of gas loosing failures, and measured how much gas was lost from each cylinder over 15 and 30 second periods.

Failure scenarios:

  • Uncontrolled free flow (by holding the purge on a second stage);
  • Low pressure hose failure, on both the long hose and the short hose (by disconnecting a second stage from the hose);
  • High pressure hose failure (by disconnecting the pressure gauge);
  • High pressure O ring failure (by cutting 25% out of an O ring).
From these experiments we discovered that the worst case scenario was a burst low pressure hose, and that it didn’t matter whether it was a long or short hose. A burst low pressure hose could actually blow a cylinder down faster than just opening the cylinder valve to the air with no regulator attached!
Rounding to the nearest decimal of a litre, the loss rate varied from 32.5 litres per second for cylinders two thirds full to 20.3 litres per second for cylinders at 60 bar. In the middle at 100 bar the loss averaged 24.4 litres per second.
Our other initial finding was that the manifold did not restrict flow between cylinders at all. Even when the isolation valve was only cracked half a turn open, both cylinders lost gas equally until the isolator was closed. Only just cracking the isolator may knock a few seconds off your shutdown time, but it will not significantly restrict the loss of gas across the manifold.
Knowing that the loss rate varied with cylinder pressure, would it vary with depth? We conducted a further experiment to check this, carrying a spare cylinder and regulator on a dive and letting it blow at 30 metres. The rate of gas loss did not change with depth.

Analysis

Armed with a selection of data, I then put it all together into a spreadsheet to calculate target shutdown times for various cylinder sizes and pressures.
Chart for 140 bar. Link to copyright statement.The results are displayed as bar charts for cylinder sizes from 7 litres to 15 litres, with TI being the time taken to close the isolation valve and each column showing T2, the additional time allowable for shutting down the relevant cylinder valve.
The first chart is for cylinders at 140 bar at the time of the failure. The “1/3 in” point on rule of thirds, where half the remaining gas is needed to get out safely.
The second chart is for cylinders at 100 bar, selected as typical of the point where an open water dive would be planned to begin ascending if decompression stops were to be made on the main gas, without stage cylinders or separate deco gas. The actual pressure would depend on the specific dive plan, but 100 bar is fairly typical.
Chart for 100 bar. Link to copyright statement.So for a diver with twin 12.2 litre cylinders, if the time to isolate (T1) was 15 seconds, the diver would have an additional 35 seconds to close the relevant cylinder valve (T2) before crossing the point at which they would have been better off without the manifold. Or in the worse case, an additional 35 seconds before they condemn themselves to missing stops or drowning.
That doesn’t sound too arduous, after all, you practice gas shutdowns regularly and have no difficult achieving these times. But let’s put the exercise into better context. Incidents don’t happen like practice exercises. They hit you by surprise at the most awkward time.
You are at 35 metres, slightly fuzzed even with nitrox. You are engrossed in whatever you are doing - laying a line, measuring a porthole, teasing a lobster out of its home, taking a photograph, swimming through a wreck, sending up a delayed SMB. Suddenly there are bubbles all over the place.
Closing isolator. Link to copyright statement. 01_209_17_small.jpgNo matter how experienced, your first reaction will be surprise and shock. It will take a few seconds to gather your wits enough to realise that you need to drop whatever you are doing and shutdown the isolation valve. You then need to fumble around and actually close the isolator. All the time bubbles are gurgling round all over the place. You hit the silt and visibility drops to zero.
Even so, all that practice pays off and you close the isolator in just 5 seconds longer than your usual practice time.
Shutdown cylinder. Link to copyright statement. 01_209_18_small.jpgSo the isolator is now closed, but bubbles are still streaming out from somewhere. You need to decide which cylinder tap is controlling the offending burst hose and close it down. In the process you may need to swap regulators.
And all the while the stress is building.
Despite all these distractions you get the cylinder tap closed. It is just about in time. Congratulations, you will live through the incident.
But as I have mentioned several times, are you prepared to bet your life on the isolate and shutdown times you achieve during practice sessions? Suppose it takes a little longer? Suppose in all the confusion you can’t work out which cylinder valve to close and have to work by trial and error? Suppose an LP hose failure happens when you have less gas to start with?
I don’t claim that our experiments or analysis are sufficiently complete to be definitive. The numbers may come out slightly different for other makes of manifold or demand valve. Maybe you should allow some additional margin for this, or maybe you should take some measurements of your own, at least enough to confirm that you can trust our results.
Personally I would be aiming for an additional 10 second margin on closing the isolation valve and an additional 15 second margin on closing the cylinder valve. To me that is a reasonable allowance for the confusion of a real situation. The sort of margin I would be confident to bet my life on.
If you have a twin 7 litre set with an isolation manifold, maybe you should re-think your dive strategy to keep the manifold closed. Treat the set as independent singles, swap regulators during the dive, and save the isolator for opening after the cylinder valve for an offending regulator has been shut down.
If you have a twin 10 litre set, you need to be very proficient to make the manifold an advantage rather than a disadvantage. Maybe you should be keeping it closed as I have suggested for twin 7s.
If you have a twin 12 litre set, you may feel happy enough with your shutdown times. I wouldn’t; but you may be more flexible and more practised than I am. It is worth noting that although the various training agencies differ in their practice exercises and targets for isolate and shutdown drills, they all come inside the critical time shown for twin 12s on the charts.
With a twin 15 litre set or larger, the margins don’t look so tight. But don’t get complacent.
One way to speed up shutdown times is with a remote control knob on the isolator valve, so that the manifold can be isolated without having to reach over your head. For a diver who, like me, is not very flexible, this certainly makes the first step of isolating cylinders easier. But you still have to reach back to close down the offending cylinder tap.
You could also try mounting cylinders upside-down, like the police and military divers do. A few minor problems like protecting valves while putting the rig on and routing hoses need to be sorted out, but there are many tried and tested solutions. Some divers claim they can reach the taps more easily this way. Others actually find it more difficult.
Whatever configuration you adopt, practice in controlled conditions before using it in anger. To benefit from a manifold, you need to be able to complete an isolate and shutdown drill fast enough to save sufficient gas to make it back to the surface. Overall, it is your decision what margins you are happy to bet your life on.

What the training agencies say:

  • BSAC: Jack Ingle: “There is no hard performance requirement in the BSAC extended range course. Personally I aim to be able to isolate and shutdown in 10 seconds.”
  • DSAT: Mark Caney: “The equipment requirement is for a minimum of twin 12 litre cylinders. The performance requirement is for a combined exercise where the diver fully closes and re-opens the isolator valve and both cylinder valves within 45 seconds, switching regulators as necessary.”
  • IANTD: Kevin Gurr: “My target is 15-20 seconds for a complete shutdown drill. That is close the centre, close number one, switch to number two, open number one, switch back to number one, close number two, open number two, open centre, check number one and two.”
  • TDI: Dave Crockford: “A training skills circuit of closing and re-opening all 3 valves, switching and checking regulators as needed, should be completed within 2 minutes. Simple division gives 20 seconds to close each valve, though I would expect divers to be faster than this.”

8 Aralık 2011 Perşembe

Suicide clips

Clip 1 is called a carabiner, great for mountaineering; number two is a boat clip, great for sailing; the third is a butterfly clip which every entomologist should carry. Neither three are good for diving, in fact they are known as suicide clips because they can easily secure you to a line unintentionally; all the line needs to do is press against the jaw and it will open. This does happen; if you have any on your gear, replace them.
The next three are much better. They can only be opened by positive pressure  away from the jaws of the clip; these are very unlikely to snag you on a line. Clip number 4 is tempting to make an all metal connection; clip 5 requires a large rotary movement to operate; clip number 6 is the clip of choice and is available in a variety of sizes. In cold water diving, the larger sizes are desirable as they must be operated with 7mm gloves.


NITROGEN NARCOSIS

NITROGEN NARCOSIS
What is it?
Named by Jacques Cousteau “l’ivresse des grandes profondeurs,” or “the rapture of the deep,” nitrogen narcosis is an ever-present factor for scuba divers.
Why so? Divers breathe compressed gas. Usually it’s air, but technical and commercial divers breathe special mixtures of other gases. And for 165 years, beginning with the work of a French scientist named T. Junod in 1835, scientists have recorded altered behavior in individuals breathing compressed gases.
Junod, for example, noted that when his divers were breathing compressed air, “the functions of the brain are activated, imagination is lively, thoughts have a peculiar charm and, in some persons, symptoms of intoxication are present.”
Similar signs and symptoms have been noted by other scientists throughout the years, including Paul Bert, a scientist better known for his keystone work in decompression illness and oxygen toxicity. When tunnel workers and divers breathed compressed air, strange – and sometimes dangerous—warning signs occurred, with euphoria, intoxication, stupor, arrested activity and unconsciousness.
Later, in 1933, the British Royal Navy conducted an investigation and discovered that 17 of 58 dives between 200 and 350 feet/61.7 and 107.9 meters resulted in a ‘semi-loss of consciousness.” The Royal Navy scientists recognized this as a serious condition because, for example, the diver continued to give hand signals at depth but later could not recall any of the events that had taken place underwater.
The first quantitative evidence of narcotic effect of compressed air at depths came in 1937 when two United States Navy scientists, C.W. Shilling and W.W. Willgrube, tested the effects of compressed air between 90 and 300 feet/27.8 and 92.5 meters on 46 men who performed addition, subtraction, multiplication and division exercises. Shilling and Willgrube recorded the time it took each man to perform these tasks and the number of errors each made at increasing depths.
They found that experienced workers were less affected, and that the most severe signs and symptoms appeared immediately when the subjects arrived at the target pressure. They discovered that the narcosis intensified with rapid compression.
In the 1950s, a growing number of quantitative experiments began using different tests to determine subjects’ intoxication levels. With studies still ongoing in nitrogen narcosis, scientists have measured slower arithmetic and motor skills in affected divers, a decrease in attentiveness and slower responses; and they have documented physical effects such as body sway, manual dexterity and disturbances in vision in “narked” divers.
Throughout the years, navigating the complexities of each successive set of experiments, the big picture comes into focus: Breathing compressed air or gas at depths can be intoxicating.
Background
Nitrogen narcosis is part of a larger syndrome called inert gas narcosis. Tracing the symptoms of narcosis specifically to nitrogen, the most common inert gas in air (79 percent), came around 1935 – a century after narcosis was first identified by Junod.
He observed that as the pressure of inhaled nitrogen in compressed air increased, warning signs of intoxication progressed, moving from an initial feeling of euphoria to drunkenness and finally to unconsciousness.
It was U.S. Navy physicians A.R. Behnke, E.P. Motley and R.M. Thomson who first attributed the narcosis to the raised partial pressure of nitrogen in compressed air. They demonstrated that when their subjects breathed compressed air deeper than 66 feet/20 meters, it caused “euphoria, retardation of the higher mental processes and impaired neuromuscular coordination.”
At 100 feet/30 meters, the signs and symptoms became more apparent. Divers experienced “a feeling of stimulation, excitement and euphoria, occasionally accompanied by laughter and loquacity,” signs and symptoms similar to those effected from alcohol, oxygen deprivation (hypoxia) and the early stages of anesthesia.
The subjects also experienced a slowing in their thought processes, and their responses to visual, auditory, olfactory and tactile stimulation were delayed. Concentration was difficult, memory became faulty, and the subjects experienced a tendency to fixate on ideas. Their powers of association became limited. They made errors in recording data, and mathematical exercises became more difficult. Fine movements were more difficult, but in general intellectual functions were more impaired than their physical dexterity.
In other words, moving around wasn’t a big issue for them, but keeping their thoughts focused became a lot harder.
Sound familiar?
If any of this rings a bell, you’ve experienced nitrogen narcosis, too.
When Does It Strike?
Researchers believe the potential for narcosis exists as soon as a diver begins to descend, but generally most divers have felt the effects beginning somewhere around 100 feet/30 meters. Narcosis has hit other divers sooner, however, as shown with Behnke and associates’ experiments, demonstrating that individuals have varying levels of susceptibility. A recent test in a Navy recompression chamber, for example, showed a definite alteration in thinking skills when divers reached 33 feet/10 meters.
Nitrogen narcosis has been called “the martini effect,” or “Martini’s Law, “ because of it’s alcohol-like effect, a feeling often compared to drinking a martini on an empty stomach: being slightly giddy, woozy, a little off-balance. One rule of thumb states that divers should consider the narcotic effect of one martini foe every 50 feet/15.4 meters of seawater.
Deaths attributed to nitrogen narcosis occur mostly among sport divers who exceed recreational limits. Scientists believe narcosis results from a slowing of nerve impulses precipitated by the effect of inert gas under high pressure. How does this happen? The narcotic potency of inert gases is related to their affinity to lipids, or fat. When nitrogen seeps into the fatty substances around the brain, it slows the communication between cells, and therefore, slows down your thinking and reaction times.
Narcosis is not unique to nitrogen; however, it can occur with many of the so-called “noble” or inert gases, with the exception of helium. Add to this the fact that other inert gases each have their own brand of narcotic effects at depth, and you have a complicated picture for technical and commercial divers. One of these rare gases, argon, for example, has about twice the narcotic potency of nitrogen, but helium has very weak narcotic properties and is less soluble than nitrogen in body tissues.
This is why we find helium used in deep and saturation diving, as demonstrated by diving physiologist R.W. Hamilton in groundbreaking experiments he conducted in 1966. Mixed with oxygen and called heliox, this mixture is less likely to impair deep divers, although they still have to undergo decompression in order to prevent decompression sickness (DCS). Helium has it’s drawbacks, however: it has a high thermal conductivity, which requires the use of heated diving suits and breathing gas; it is quite expensive and difficult to store, and it distorts the voice.
What Can You Do?
As to the cause of narcosis, there is one prevalent theory that states nitrogen partial pressure is responsible. One fact that emerges from all this research is that there is a wide range of susceptibility among individuals.  And individual sensitivity can vary from day to day.
The fact is that if you dive, you take the chance of getting narked. The good news is that if you do experience narcosis, the shallower you get the less you will feel the effects. And it doesn’t take long at all for the effects to wear off once you get topside.
Before you dive, however, stop and take stock of these suggestions:
· Know your limits
Exercise your discipline. Diving is a multitasked activity: You have to pay close attention to your thoughts, feelings, attentiveness – in addition to your buddy, depth and air consumption. If you notice a sudden lightheadedness or experience confusion, try to step back mentally and take stock of what’s happening to you and around you. Then slowly ascend to a shallower depth.
· Watch your carbon dioxide levels
Increased levels of CO2 can increase your potential for nitrogen narcosis. The working or swimming diver wearing a breathing device is more susceptible to narcosis than a diver in a chamber. And the effect is synergistic: that means the effect CO2 wields can have a greater wallop.
· Avoid alcohol
When you’re planning your dive excursion, keep in mind that alcohol augments the signs and symptoms of nitrogen narcosis. Why? “Because of the similar (and additive) effects to excess nitrogen, alcohol should be avoided before any dive. A reasonable recommendation is total abstinence at least 24 hours before diving; by that time effects of alcohol should be gone, “ advises dive physician, Dr. Lawrence Martin.
· Be rested when you dive
Refrain from hard work and it’s resultant fatigue before and immediately after your dives. Work and fatigue can cause higher levels of CO2 in the body, which results in metabolic effects on the neurotransmitters in your brain.
· Be calm before you dive
Go well prepared so you can look forward to your trip. Anxiety increases you r susceptibility to narcosis. “The exact mechanism isn’t known,” adds Dr. Peter Bennett, DAN Chie Executive Officer, “but it has an effect on the brain’s neurotransmitters, in the same place anxiety operates.”
· Descend slowly on deep dives
Experiments have shown that rapid compression affects divers more severely than slow compression.
· Stay Warm
Cold makes narcosis worse. As with anxiety, the precise mechanism is unknown, but cold can have analgesic and anesthetic effects. These reactions in turn can be synergistic, packing a greater than expected punch.
If you feel the effects of narcosis and recognize it, head for the surface and fresh air. Remember to breathe, ascend slowly, make your safety stop, then get out into the open. You’ll be back to normal in no time. And if you have questions about nitrogen narcosis, call DAN Medical Information Line.


References
The Physiology and Medicine Of Diving. 4th Edition, by Peter Bennett, PhD, D.Sc. and David Elliott, D.Sc.; Chapter 7: Inert Gas Narcosis, 1995.
Bove and Davis’ Diving Medicine, 3rd Edition; by Alfred Bove: Chapter 9: Inert gas Narcosis and High Pressure Nervous Syndrome; 1997.
Scuba Diving Explained, Questions and Answers on Medical Aspects of Scuba Diving: Lawrence Martin, MD; 1997.
Diving Medicine Online: by Ernest S Campbell, MD, FACS: www.scuba-doc.com
‘Nitrogen Narcosis’, by John Francis, Field Editor, Rodale’s Scuba Diving Magazine, www.scubadiving.com/training/instruction/narced.shtml